What are Microservices?
Introduction
The term "microservices" appears in many technology journals these days. This blog addresses common questions including: "What are microservices, and more importantly, how are they a better solution than what's already out there? Also, if microservices are so great, how easy is it to develop microservices?" Microservices are stand-alone applications that break down functionality into fine-grained components that run and restart independently.
The Problem
The problem with large, monolithic applications is that they are difficult to maintain, test, and extend. Component architectures such as COM, SOA, etc. promised reusability but led to proliferations of libraries that became hard to maintain as well (e.g., DLL hell or JAR hell, etc.). Microservices with Spring Cloud promise faster change, greater availability, fine-grain scaling, and better adaptation to DevOps thinking. They typically use REST and HTTP to decouple components, leading to easier scalability. With Spring Cloud and Spring Boot, you get an opinionated framework that reduces the work required when developing services while offering flexibility when you need to customize your system.
The Solution
Core Characteristics of Microservices Include:
- Components exposed as services: Services are registered in a registry.
- Tied to a specific domain: Services can focus on their own work rather than being tied to the workings of other services.
- Loosely coupled: There's a natural separation of concerns, since the services can focus on their individual work. This narrowed focus reduces concerns such as how the services talk to each other or what's going on inside the other services.
- Built to tolerate failure: Because components are not intertwined, the system is built to allow services to be automatically retried when a down service returns to health. Systems are assumed to fail, so resiliency is baked right in.
- Delivered continuously via automation: Services can be updated independently and deployed without disturbing other components.
- Built and ran by independent teams: Teams can "divide and conquer" by splitting the work into smaller components that don't disturb each other.
Components of Spring Cloud Thanks to Netflix®:
- Service registry and discovery in Spring Cloud Eureka
- Circuit breaking technology in Spring Cloud Hystrix
- Client-side load balancing in Spring Cloud Ribbon
- Service proxying and API gateway via Spring Cloud Zuul
- Messaging (Kafka, Rabbit MQ, etc.) through Spring Cloud Stream
- Data processing pipelines with Spring Cloud Data Flow
- Convenient name proxies with Feign
Real World Use Cases for Microservices
Our recent work with a client allowed us to have a hands-on experience with microservices in a real-world education environment. We were able to deploy developers across multiple parts of the system and have them work independently to bring the system forward. In addition, we took advantage of a mixed online and local environment, to isolate components used only for development from deployed components. Eventually, we did end up with a local deployment for improved performance (initially getting things working online). Also, we used Vagrant to deploy a complete development environment for the developers working on the front end. This lessened concerns regarding wiring up microservices or having to stub out services, enabling front end developers to come up to speed quickly.
Microservices In Action: A Vending Machine Service
Application Background
Now, let's look at microservices in action for a real-world application. In this case, we are starting with a service to display the inventory in a vending machine. We will illustrate a problem with the application and see how Spring Cloud's Eureka can better separate the client from the server. A client (e.g., a mobile app or mobile-responsive web app) could talk directly to the vending machine. While this can be demonstrated using an HTTP lookup, the following example will simply use localhost.
This code was created using Spring Tool Suite (STS) based on Eclipse and Maven; however, the code was initiated using Spring Initializr at http://start.spring.io .
Application in Action
For our model, we have a vending machine (i.e., a dispenser) containing sleeves of items. Each item is either a can or bottle with a brand associated with it. In our example, the inventory is hard-coded, but live.
Produce an inventory in JSON of the products in the dispenser:
http://localhost:8086/inventory

Withdraw a beverage item and update the inventory:
http://localhost:8085/beverage/{line}

{line} is a value from 0-4 corresponding to the brand dispensing line in our stock inventory.
To display the current contents in a client, we have a second service that simply calls the above directly to display the current inventory:
http://localhost:8086/dispenser

(This is before withdrawing a beverage as in the above URL)
Repeatedly hitting the beverage line will deplete the inventory:

One of the many benefits of microservices architecture is to decouple the client from service; we can use the Eureka service registry as a means to discover services rather than hard-coding websites or references into code. Now, if the server remains at a fixed address or domain, we would have no difficulty; however, if the client were, say, embedded within a mobile web application, we would need to update the client every time the server name changed. Moreover, we would need to rely on a hardware load balancer to scale up on load. Instead, we can use the Eureka service to make the server discoverable by the client and we then demonstrate how to decouple the services.
Installing the Application
Steps:
- Create a development directory for the Vending Machine software
- $ cd <working-directory>
- For me, this is
$ cd /Users/fredericvanwest/Downloads/VendingMachine/checkout
$ mkdir VendingMachine
$ cd VendingMachine
- Clone the repositories from git
- From the UNIX command line, clone the repository
- This will retrieve the sample repositories and stage them for development
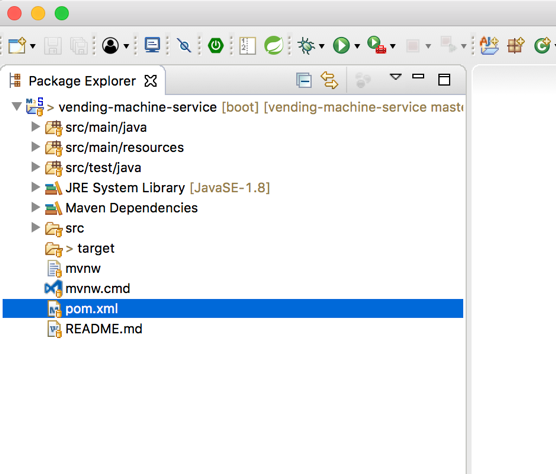
- Import the vending-machine-service into Spring Tool Suite
- Launch Spring Tool Suite
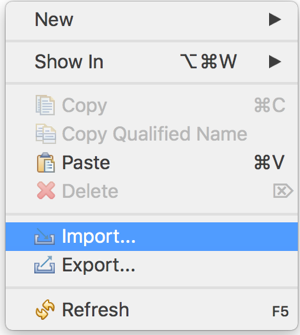
- From Package Explorer, right-click and select "Import…"

- Select "Maven > Existing Maven Projects"
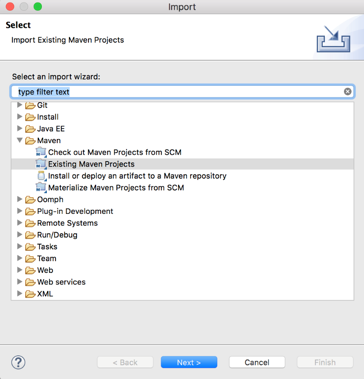
- Select "Next"
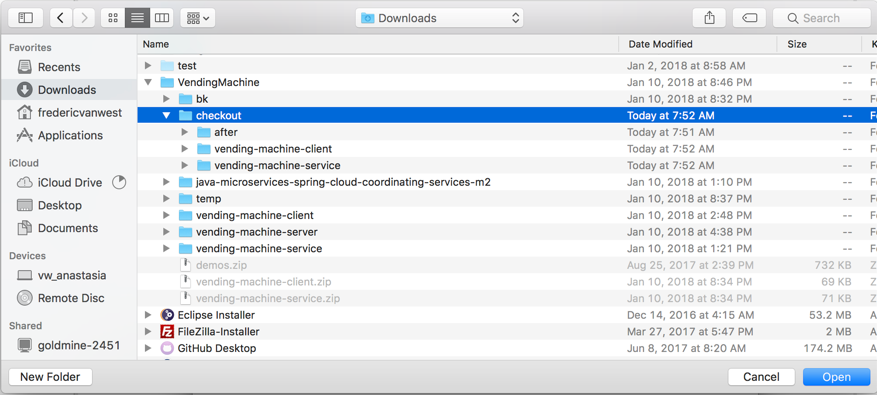
- In "root directory" navigate to the working directory:

- Click "Open"
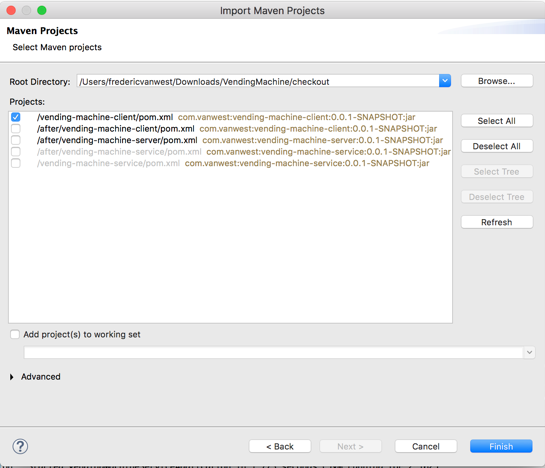
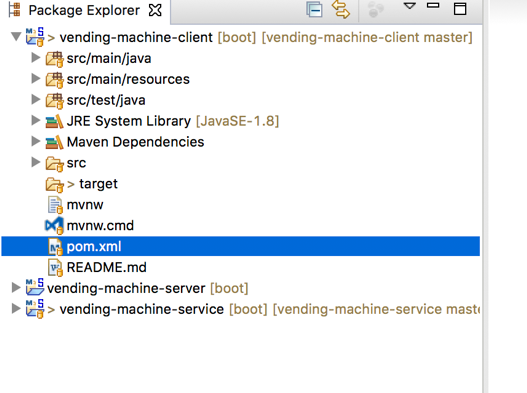
- At this point, select the /vending-machine-service/pom.xml file:
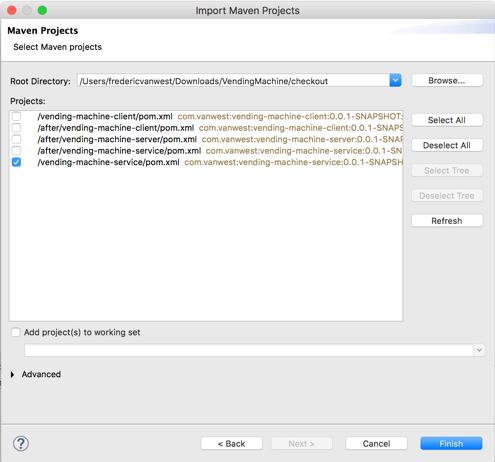
- Click "Finish"
- The project should build immediately
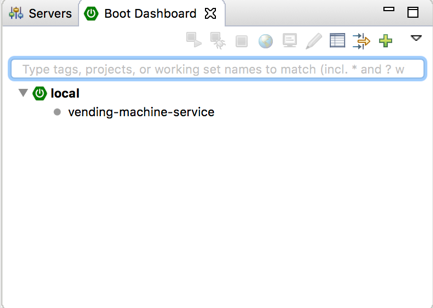
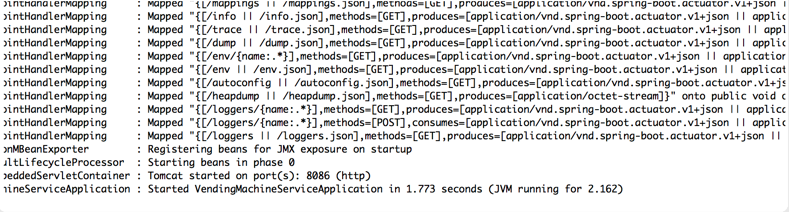
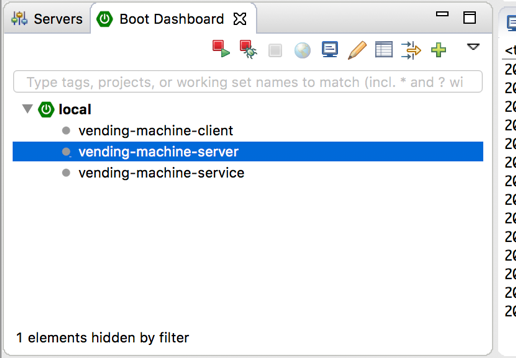
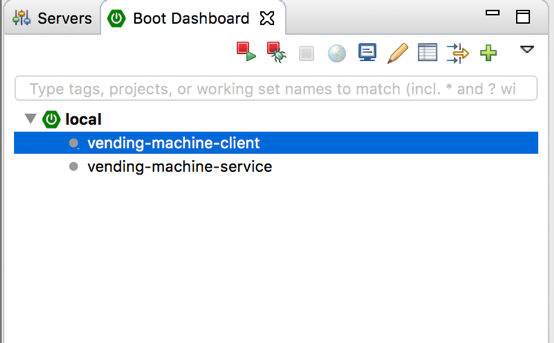
- Under the "Boot Dashboard", "Local > vending-machine-service", right-click and select "(Re)start":

- This will start the service running on port 8086:
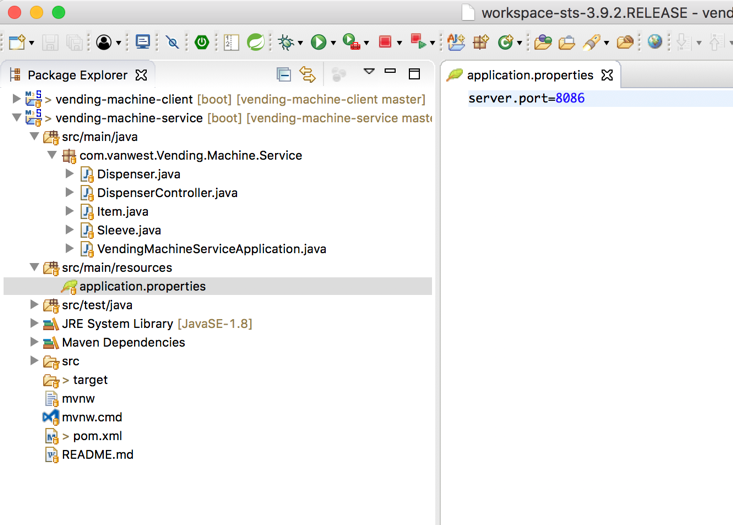
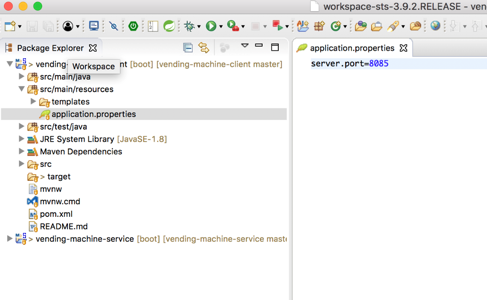
- If port 8086 is unavailable, you'll need to adjust in the application.properties file under "src > main > resources":
- You can test if the service is running by opening a web browser and hitting the URL
- http://localhost:8086/inventory (See above as well)
- You should see that the following returned:
{"sleeves":[{"items":[{"type":"can","brand":"Coke"},{"type":"can","brand":"Coke"},{"type":"can","brand":"Coke"}]},{"items":[{"type":"can","brand":"Diet Coke"},{"type":"can","brand":"Diet Coke"}]},{"items":[{"type":"can","brand":"Sprite"}]},{"items":[{"type":"can","brand":"Dr. Pepper"},{"type":"can","brand":"Dr. Pepper"}]},{"items":[{"type":"bottle","brand":"Dasani"},{"type":"bottle","brand":"Dasani"},{"type":"bottle","brand":"Dasani"},{"type":"bottle","brand":"Dasani"}]}]}
- Launch Spring Tool Suite
- Import the vending-machine-client into Spring Tool Suite:
- From Package Explorer, right-click and select "Import…"
- Select "Maven > Existing Maven Projects":

- Select "Next"
- In "root directory" navigate to the working directory:
- Click "Open"
- At this point, select the /vending-machine-client/pom.xml file:
- Click "Finish"
- The project should build immediately
- Under the "Boot Dashboard", "Local > vending-machine-client", right-click and select "(Re)start":


- This will start the client running on port 8085
- If port 8085 is unavailable, you'll need to adjust in the application.properties file under "src > main > resources":
 >
> - You can test that the service is running by opening a web browser and hitting the URL:
- http://localhost:8085/dispenser (See above illustrations)
- You should see:
COKE: 3 DIET CODE: 2 SPRITE: 1 DR PEPPER: 2 DASANI:4
- Note: The inventory is reset every time that the vending-machine-service is cycled, so the results above can be returned by restarting that service
- Also, you can test that the inventory goes down by issuing:
http://localhost:8086/beverage/0 - This will return a JSON representation of an item:
{"type":"can","brand":"Coke"} - A subsequent call to http://localhost:8085/dispenser will now yield:
COKE: 2 DIET CODE: 2 SPRITE: 1 DR PEPPER: 2 DASANI:4
- This demonstrates that the COKE inventory dropped by one
- Make sure to stop the services in STS before proceeding
- Create the Eureka Server
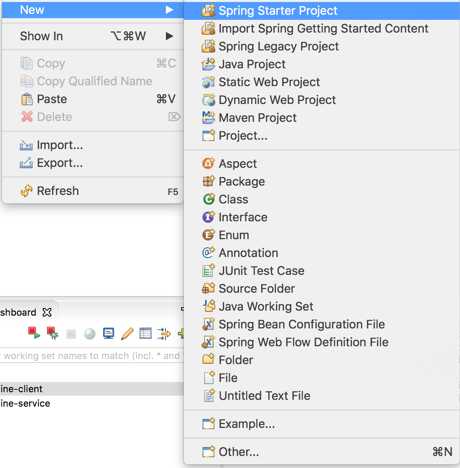
- From Package Explorer, right-click and select "New > Spring Starter Project":
- From the dialog, change
- Name: vending-machine-server
- Group: com.vanwest
- Artifact: vending-machine-server
- Description: Vending Machine Server
- Package: com.vanwest
- Uncheck default location and select the same root directory as were used for vending-machine-server and vending-machine-client
- Make sure to paste "vending-machine-server" on the end of the Location:
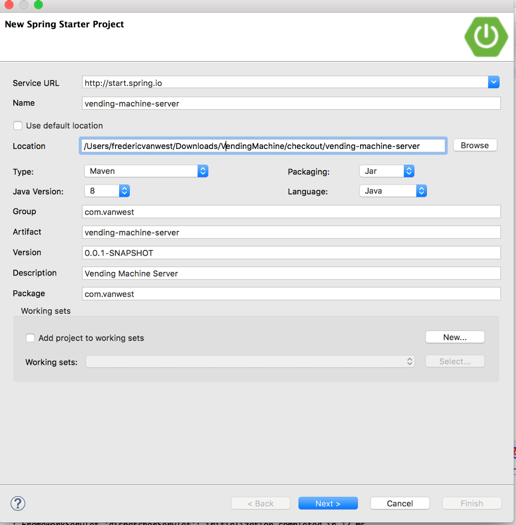
- Click "Next"
- Select "Cloud Discovery > Eureka Server":
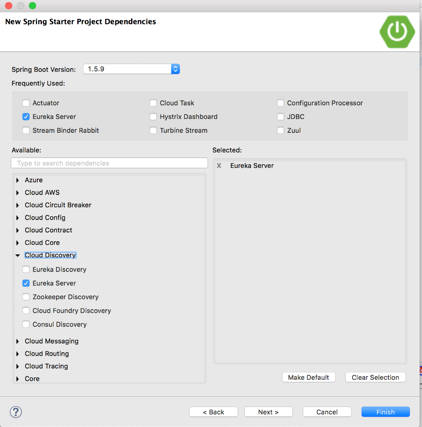
- Select "Ops > Actuator":
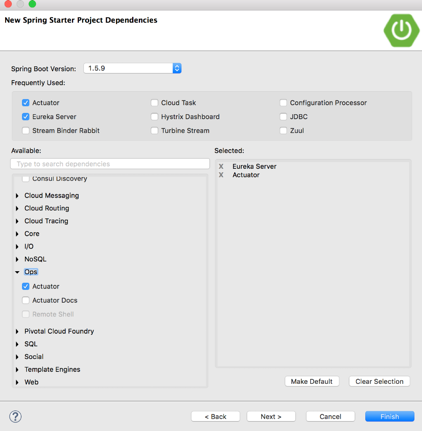
- Click "Finish"
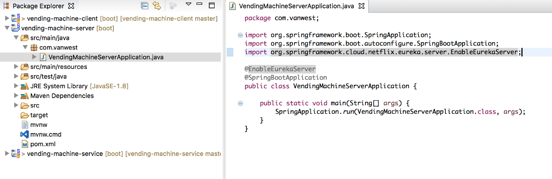
- Add Eureka server to code
- Open "src > main> java > com.vanwest > VendingMachineServerApplication.java"
- Above @SpringBootApplication, add @EnableEurekaServer and fix imports
- Open "src > main > resources > application.properties", and enter:
server.port=8761
eureka.client.register-with-eureka=false
eureka.client.fetch-registry=false
eureka.datacenter=phoenix
eureka.environment=development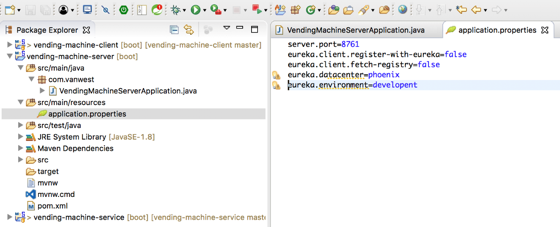
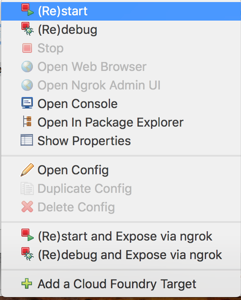
- Under the "Boot Dashboard", "Local > vending-machine-server", right-click and select "(Re)start":

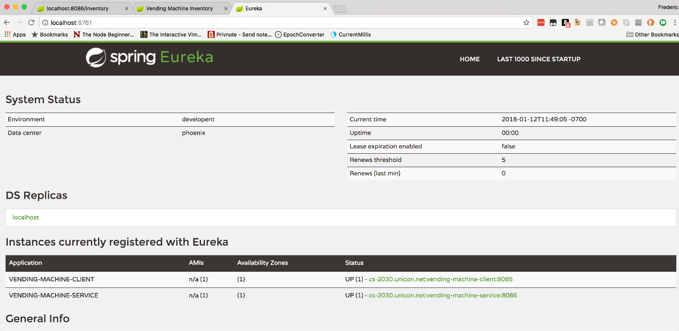
- You can see that Eureka is running by hitting the website:
http://localhost:8761 - You should see that the "test" and "phoenix" environments are displayed
- Under "Instances currently registered with Eureka" you should see "No instances available":
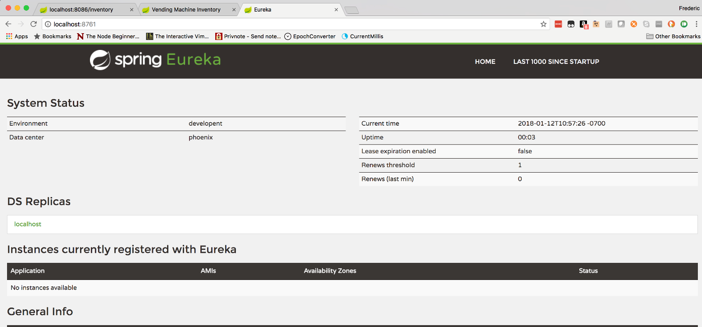
- You can see that Eureka is running by hitting the website:
- From Package Explorer, right-click and select "New > Spring Starter Project":
- Adjust the vending-machine-service to be a Eureka client
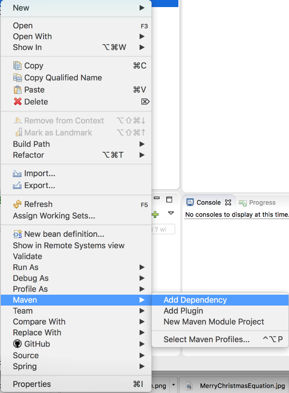
- From "Package Explorer" right-click on "vending-machine-service" and select "Maven > Add Dependency":

- In "Enterd groupi, artifactId or sha1 prefix or pattern (*):" enter: "spring-cloud-starter-eureka"
- Select "org.springframework.cloud spring-cloud-starter-eureka":
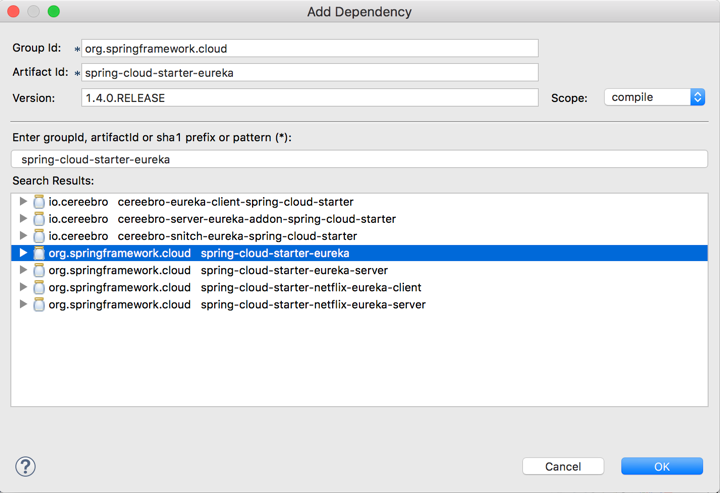
- Click "OK"
- Open "src > main > java > com.vanwest.Vending.Machine.Service > VendingMachineServiceApplication.java"
- Above @SpringBootApplication, add @EnableEurekaClient and fix imports:
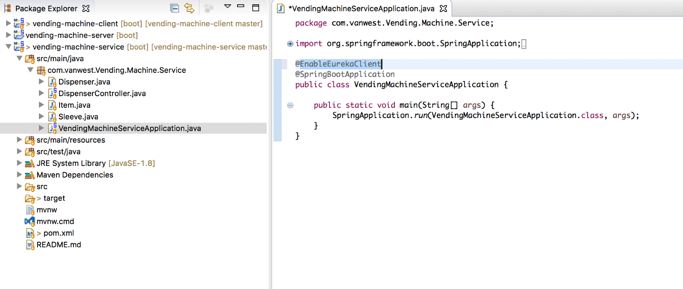
- Save the file
- Open "src > main> resources > application.properties" and enter:
eureka.client.register-with-eureka=true
eureka.client.fetch-registry=true
eureka.instance.hostname=localhost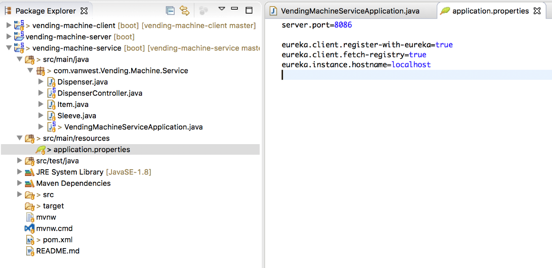
- Save the file
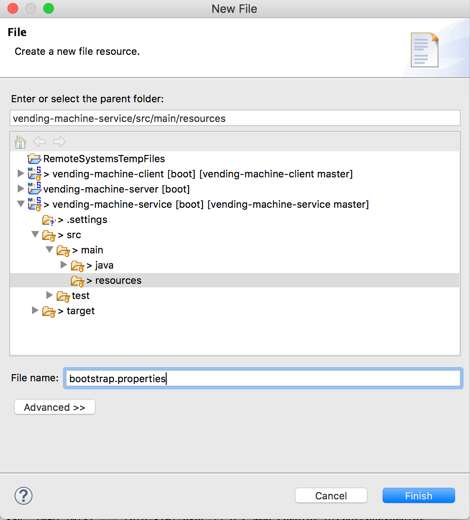
- Right-click on "src > main > resources" and select "New > File" and enter: "bootstrap.properties":
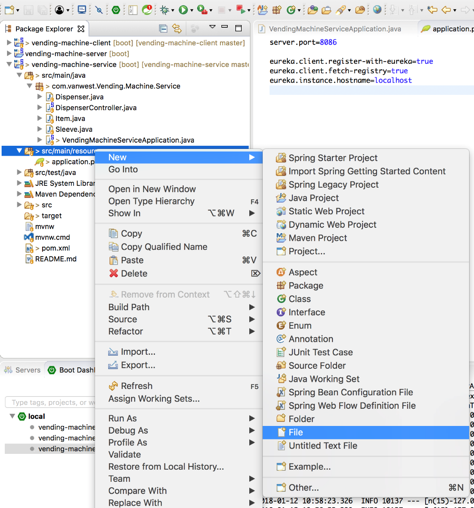

- Enter: spring.application.name=vending-machine-service
- Save the file
- Under the "Boot Dashboard" "Local > vending-machine-service" right-click and select "(Re)start":

- Assuming you left vending-machine-server running, open:
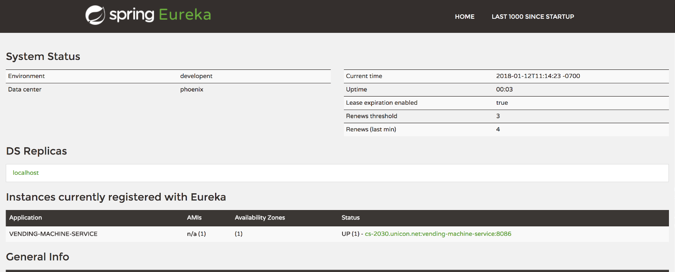
http://localhost:8761 - Under "Instances currently registered with Eureka" you should see "VENDING-MACHINE-SERVICE":
- You can reassure yourself the service is running with the tests above by opening:
http://localhost:8086/inventory
- From "Package Explorer" right-click on "vending-machine-service" and select "Maven > Add Dependency":
- Adjust the vending-machine-client to be a Eureka client and use a named servicen in place of the hard-coded address
- From "Package Explorer" right-click on "vending-machine-client" and select "Maven > Add Dependency":
- In "Enter groupid, artifactId or sha1 prefix or pattern (*):" enter: "spring-cloud-starter-eureka"
- Select "org.springframework.cloud spring-cloud-starter-eureka":

- Click "OK"
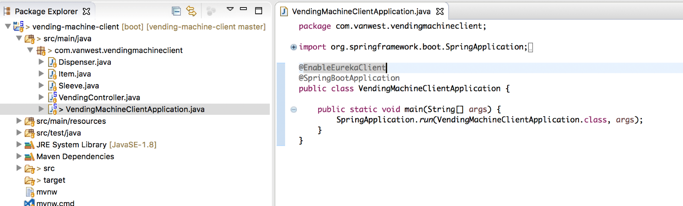
- Open "src > main > java > com.vanwest.vendingmachineclient > VendingMachineClientApplication.java"
- Above @SpringBootApplication, add @EnableEurekaClient and fix imports:
- Open "src > main > java > com.vanwest.vendingmachineclient > VendingController.java":
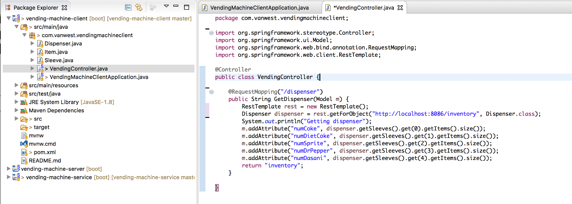
- Under "VendingController" enter:
@LoadBalanced
@Bean
public RestTemplate restTemplate(RestTemplateBuilder builder) {
return builder.build();
}@Autowired
private RestTemplate restTemplate; - In method GetDispenser, replace:
RestTemplate rest = new RestTemplate();
Dispenser dispenser = rest.getForObject("http://localhost:8086/inventory",
Dispenser.class);with:
//RestTemplate rest = new RestTemplate();
//Dispenser dispenser = rest.getForObject("http://localhost:8086/inventory",
//Dispenser.class);
Dispenser dispenser = restTemplate.getForObject("http://vending-machine-service/inventory", Dispenser.class);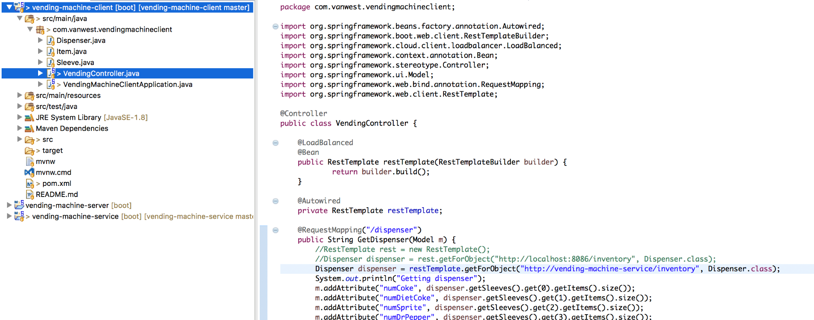
- Save the file
- Open "src > main> resources > application.properties" and enter:
eureka.client.register-with-eureka=true
eureka.client.fetch-registry=true
eureka.instance.hostname=localhost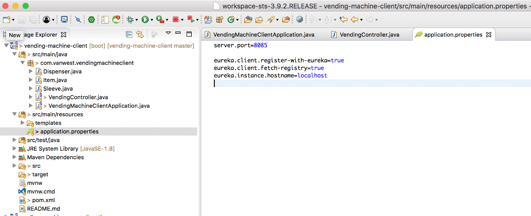
- Save the file
- Right-click on "src > main > resources" select "New > File" and enter: "bootstrap.properties":
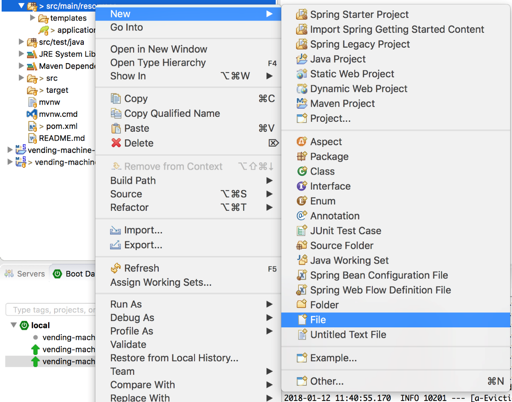
- Enter: spring.application.name=vending-machine-client
- Save the file
- Under the "Boot Dashboard", "local > vending-machine-client", right-click and select "(Re)start":

- Now open:
http://localhost:8761
- Under "Instances currently registered with Eureka" you should see "VENDING-MACHINE-CLIENT":
- You can reassure yourself the service is running with the tests above by hitting:
http://http://localhost:8086/beverage/0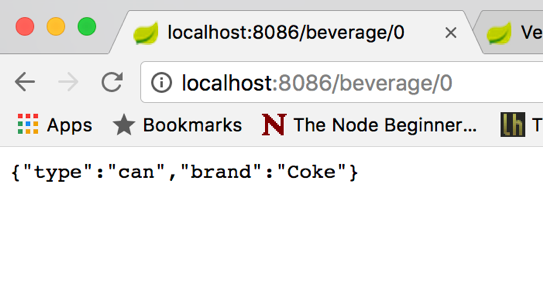
and seeing that the inventory is now reduced in:
http://localhost:8085/dispenser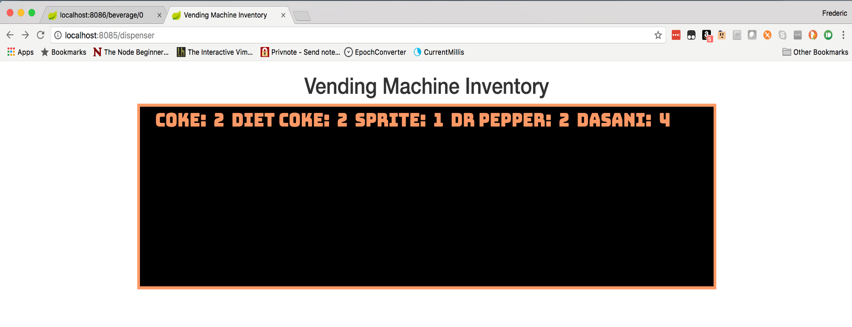
- Now open:
So here we can see how a direct named URL was replaced with registry lookup in Eureka. The Spring Cloud framework makes it much easier to create microservices and manage them. Additional features, such as circuit breaker technology, can allow a microservice to halt on fault or load and resume when conditions improve without human intervention. Microservice technology is instrumental in deploying fault-tolerant systems, which is especially true in the education domain.
- From "Package Explorer" right-click on "vending-machine-client" and select "Maven > Add Dependency":